
Install Dirassa Studio and link it to your school
Dirassa Studio is the desktop app: you record and edit your lessons in it, draw questions, maps and booklets from them, then send them to your courses on Dirassa Plus. It all starts with three moves: download the build for your computer, install it, and link the computer to your school from your browser in one click. After that your linked computers show on the web, you revoke the ones you no longer use, and the app keeps itself up to date.
- About 10 minutes, mostly downloading
- 5 steps
Who can do it: Requires a Mac or a Windows PC, and permission to edit lessons in your role. Revoking other people’s devices needs permission to manage the team.
 Let Noqta show you
In 5 steps
- 1In “Dirassa Studio” on the dashboard, open “Downloads & devices” and pick Apple Silicon, Intel or Windows.
- 2Install and open the app: on Mac by dragging it into Applications, on Windows by running the installer.
- 3Press “Sign in with Dirassa+”, then allow the device in your browser.
- 4Your computers are listed under “Linked devices”; revoke one from Settings, “Devices”.
Before you start
- A Mac (Apple chip or Intel) or a 64-bit Windows PC. A phone is for managing your account; the app runs on a computer.
- A connection good enough to download about 150 MB.
- A Dirassa Plus account whose role can edit lessons at your school.
- A browser on the same computer, signed in or with your password at hand.
- Step 1 of 5
Download the build for your computer
On the dashboard, open “Dirassa Studio”, then the “Downloads & devices” tab (or the “Download app” button from any other tab). A line at the top says: “Choose the build for your computer. Mobile supports account management; Studio runs on desktop.”, with the current “Version”. Then three cards: Apple Silicon for an M1, M2, M3 or M4 Mac, Intel for an Intel Mac, Windows for 64-bit Windows. Press “Download app” on your computer’s card: a file of about 150 MB arrives, a .dmg for Mac, or one ending in -setup.exe for Windows.
On screenDirassa StudioDownloads & devicesDownload appVersionOfficial release pageTipNot sure which chip your Mac has? Apple menu, “About This Mac”: “Apple M…” means Apple Silicon, “Intel” means Intel.
Heads-upThe Apple Silicon build does not run on an Intel Mac, nor the other way round. The Intel card carries the latest build published for Intel, older than the Apple Silicon and Windows ones: “Latest published Intel build; older than the Apple Silicon and Windows release.”
- Step 2 of 5
Install it and open it
On Mac: open the .dmg, drag the Dirassa Studio icon into the Applications folder, then open it from there. On Windows: run the installer and follow it, then open Dirassa Studio from the Start menu. The first launch greets you: “Welcome to Dirassa Studio” and “Record a lesson. Publish everything around it.”; press “Get Started”. The guide first asks you to link your account (next step), then on Mac the system permissions: “Screen Recording” and “Accessibility”, plus “Microphone” and “Camera”, both “Optional”. Each permission you grant turns “Granted”.
On screenWelcome to Dirassa StudioGet StartedScreen RecordingAccessibilityMicrophoneCameraOptionalGrantedContinueTipRecording your voice or your face? Grant “Microphone” and “Camera” now, so your first recording doesn’t stop to ask.
Heads-upAfter you enable a permission in the Mac’s settings it may keep showing as denied until the app restarts: “Restart Required” appears, press “Restart, I've granted permission”.
- Step 3 of 5
Link the computer to your school
The “Connect your Dirassa+ account” screen says why: “Your coin balance” that pays for services, “Publishing lessons” to your courses, and “Your work, everywhere”. Press “Sign in with Dirassa+”: your browser opens and the app waits (“Waiting for the browser… finish signing in there, and this screen continues on its own.”). If you aren’t signed in, sign in first. Then the “Connect Dirassa Studio” page: it names the “Workspace” this computer will write to (pick one if you belong to several schools) and the “Device name” (“My computer”; call it “Office computer” or “Photo studio” so you recognise it later). Press “Allow this device”: “Connected. Return to the Studio app.”, and the app shows “Signed in as …”. Press “Continue”.
On screenConnect your Dirassa+ accountSign in with Dirassa+Cancel sign inConnect Dirassa StudioWorkspaceDevice nameAllow this deviceSigned in as …TipWorking at two schools? Read the “Workspace” name before you press: lessons sent from this computer go there, and coins come out of its balance.
Heads-upFor now the linking page always opens in Arabic: its button reads “اسمح لهذا الجهاز” and the field above it “اسم الجهاز”. And if it says you need lesson-editing permission, ask the school’s owner for it.
- Step 4 of 5
Your linked computers
In “Downloads & devices”, below the cards, “Linked devices”: each computer with its name, its system (macos or windows) and the app version, its status “Linked” or “Revoked”, and when it was last used. To revoke one, open Settings, then the “Devices” tab: each device shows “Last seen” (or “Never used”) and a “Revoke device” button; press it and a red “Confirm revoke” line appears: press “Revoke device” there once more (or ✕ “Cancel” to back out). It turns “Revoked” and that computer can no longer read from or send to your school. Whoever manages the team sees everyone’s computers, grouped as “Your computers” and then “…’s computers”.
On screenLinked devicesLinkedRevokedDevicesLast seenNever usedRevoke deviceConfirm revokeCancelYour computersTipThere is no limit on computers, but every approval adds a new line, even for the same computer if you sign in again. Revoke the old line to keep the list honest.
Heads-up“Sign Out” in Dirassa Studio’s settings clears the sign-in on the computer only: the line stays “Linked” on the web. For a lost or sold computer, revoke it under “Devices”. The app version shows from the release after 0.1.5; before that you see “—”.
- Step 5 of 5
Updates come by themselves
Dirassa Studio looks for a new version about 45 seconds after it opens, then every two hours, and touches nothing while you record. On Mac it downloads and installs the update in the background, then tells you: “Dirassa Studio N is installed — restart to apply it.” with “Restart Now” and “Later”. On Windows: “Dirassa Studio N is ready to install.” with “Install and restart”, then a progress bar, and the app restarts itself. If you put it off, an “Update ready” or “Update available” pill stays on the home page, and a line under the version number in settings. You can also check yourself: “Check for updates” in settings. After the restart the app says “Updated to N”.
On screenRestart NowLaterInstall and restartUpdate readyUpdate availableCheck for updatesChecking…You're already using the latest version of Dirassa Studio.Updated to NTipRestarting loses nothing you’re working on, so don’t put it off for days: fixes only apply after a restart.
Heads-upIf “Failed to download or install the update.” appears, press “Try again”; if it keeps happening, download the new build from “Downloads & devices” and install it over the old one — nothing is lost. An Intel Mac doesn’t get the in-app update today: when a newer Intel build is published, download it from the same page.
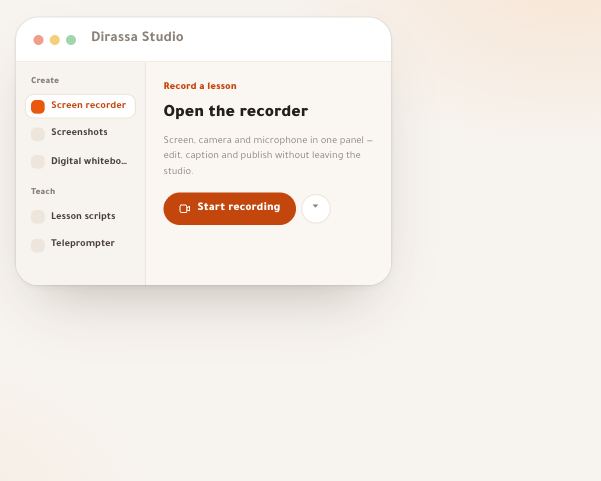
After installing and linking
- Record your first lessonScreen, camera and voice, then editing, on your computer.
- Know your balanceCoins in the app’s “Balance” and in “Coins” on the web.
- Build from the lessonQuestions, maps and booklets from your recording, reviewed before students.
- Watch your devicesRevoke under “Devices” any computer you no longer use.
Questions
Which build do I download for my Mac?
Apple menu, “About This Mac”: an “Apple M1” chip or later means Apple Silicon; “Intel” means Intel. They don’t swap: an Intel Mac refuses the Apple Silicon build on first launch.
Does it run on a phone, a tablet or Linux?
No. The page offers Mac (Apple Silicon and Intel) and 64-bit Windows only. On a phone you manage your account and balance from the dashboard; recording and editing happen on a computer.
I work at two schools — which one gets the computer?
The one you pick under “Workspace” on the linking page, among the schools where you can edit lessons. A computer serves one school at a time; to switch, sign out in the app’s settings, sign in again and pick the other.
How many computers can I link?
Dirassa Plus sets no limit. Each computer shows under “Linked devices” by name, and you revoke whichever you like.
I lost my computer — what now?
Settings, “Devices”: “Revoke device”, then the red “Revoke device” under “Confirm revoke”. From that moment everything that computer asks of your school is refused. The school’s owner can do it for you too.
Sign-in didn’t finish — what do I do?
If “Sign in did not finish. Check your connection and try again.” appears, check the network and press again. If you closed the browser before allowing the device, press “Cancel sign in” and start over.
Does an update lose my work?
No. It replaces the app; your recordings and projects on the computer stay as they are, even if you install the new build by hand over the old one.