
The certificate editor: fields, seal, signature, and Noqta reviewing it
The editor is a sheet at its real size (A4 or Letter, in millimetres), carrying the template’s words and fields that fill themselves at issue: the student’s name, the course, duration, mark, number and verification code. You never type anyone’s name by hand. In this lesson Mourad finishes the calligraphy certificate: he changes a sentence, places his seal and signature, asks Noqta for a French column, previews it with his longest student name, then approves it.
- About 8 minutes
- 6 steps
Who can do it: Needs “Manage certificates”. Without it, the editor opens read-only.
In 6 steps
- 1Open the editor from “Edit design”: the sheet in the middle, five panels at the side.
- 2Double-click a text to write; “/” inserts a field that fills itself, in masculine and feminine.
- 3From “Add”: seal, signature, verification code, logo, data row; each element is set in its properties.
- 4Signature, seal and numbering are set once in “Signature & seal”, for all your certificates, with your password.
Before you start
- Create the certificate first (the lesson “First certificate”): the editor opens on the template you chose.
- Have your signature ready in black pen on white paper if you want to photograph it, and your academy’s seal as a PNG if you have a real one.
- Step 1 of 6
The sheet and the editor panels
The sheet at real size in the middle, five panels at the side, and a top bar for preview and approval.
- Five panels“Templates”, “Add”, “Layers”, “Identity” and “Noqta”.
- Fields or data“View”: “Fields” shows their names, “Real data” fills them.
- Saved by itselfEvery change saves; “Undo” steps back.
Tip“Templates” changes the layout and keeps your words: try three templates in a minute, “Undo” brings you back.
All the details
From the certificate page, click “Edit design”. In the middle, the sheet: A4 or Letter, “Landscape” or “Portrait”, in millimetres. At the side, the “Editor panels”: “Templates” (“Your words stay, the layout changes”), “Add”, “Layers” (show/hide, lock), “Identity” and “Noqta”. Select an element and its toolbar appears, its properties beside it. Under the sheet: “View” (“Fields” or “Real data”), “Print margins” and “Fit to screen”. Everything saves by itself, and “Undo” steps back from anything. On a phone the same editor works with buttons at the bottom of the screen.
On screenEdit designLandscapePortraitEditor panelsTemplatesAddLayersIdentityNoqtaViewFieldsReal dataPrint marginsFit to screenUndo - Step 2 of 6
Text and fields that fill themselves
Write the sentence once, with fields: it fills for every student, in their own wording.
- “/” for a fieldStudent name, course, duration, date, mark, average, rank, tier…
- Masculine and feminineArabic’s “أتمّ / أتمّت” in one sentence, as the student confirmed.
- Optional part“Removed if its field is missing”: no grade line for those without one.
TipWrite the sentence as you’d say it to one student; the fields make it right for all.
All the details
Double-click any text to write: “Type, and “/” to insert a field”. “/” opens the “Fields”: student name, Latin name, certificate, course, duration, date, number, and whatever the source gives — the mark and grade for an exam, the average, rank and tier for an average-based certificate. “Masculine and feminine” agrees the sentence. “Optional part” (“Removed if its field is missing”): put “with the grade …” inside it, and nothing is left blank for those without a grade. ⌘B for bold. And “Fits the name”, in the student name’s properties: a long name shrinks to the minimum, then wraps; “Name test” tries it on your real students’ longest names.
On screenType, and “/” to insert a fieldFieldsMasculine and feminineOptional partRemoved if its field is missingFits the nameName testStudent nameLatin nameHeads-upA field the source doesn’t give (a mark on an attendance certificate) shows in “Before activating” as a field with no source. Delete it or put it in an optional part.
- Step 3 of 6
Seal, signature and verification code
From “Add”, drag what you want onto the sheet; set it to the millimetre.
- Eight sealsOfficial round, ink stamp, office stamp, wax, gold foil, medal, guilloche, modern.
- Verification codeOpens the verification page on your domain; at least 15 mm.
- LayersTop is in front, ⌥↑↓ to reorder, and lock what mustn’t move.
TipA certificate for children? “Medal” or “Modern” in the template’s colour. Professional training? “Official round” or “Office stamp” in ink.
All the details
“Add” holds the “Auto-filled fields” and the “Elements”: “Text”, “Your logo”, “Signature”, “Seal”, “Verification code”, “Divider”, “Frame”, “Ornament”, “Data row”, “Topics” and “Second language”. Click or drag onto the sheet. Select the seal: “Seal style” offers the “Identity seal” or one of the eight, with its text. The signature: “Who signs”, from the identity’s signers. The verification code: “At least 15 mm so it scans easily”. Also in the properties: “Certificate colours” (“Every element draws from them”), “Your academy’s colour”, “Restore template colours” and “Sheet language”.
On screenAuto-filled fieldsElementsYour logoSignatureSealVerification codeData rowTopicsSecond languageSeal styleIdentity sealWho signsCertificate coloursYour academy’s colourRestore template coloursSheet language - Step 4 of 6
“Signature & seal”: once, for all your certificates
Signers, seal, numbering, the verification page and the academy’s name on paper: one page, with a live preview and one save.
- A signer and their signature“Draw” or “Photograph the paper” (background removed). No signer is saved without one.
- The sealEight styles made from your academy’s name, or “My seal”: your real seal’s image.
- Saved with your passwordEvery save is logged and the owner notified. What’s issued doesn’t change.
Tip“Photograph the paper” gives your real signature, in ink: nicer than one drawn with a mouse.
All the details
The editor’s “Identity” panel shows the “Signers”, the “Seal” and “The academy on paper”, and “Edit identity” opens the “Signature & seal” page in a new tab (also reached from its link at the head of “Certificates”). Beside it, the “Preview”: one of your certificates with what you’re changing, or “With sample names” before the first one. First “Who signs” (up to 3; the first, “Default”, prints on every design): “Add a signer” opens the “New signer” popup in the middle of the screen: “Name as printed” and “Role”, then the signature: “Draw” (with your mouse or finger, above the line) or “Photograph the paper” (“Sign with a black pen on white paper, then take a photo. The background is removed automatically.”; an image already on your device works too), then “Save signer”. Without a signature nothing is saved: “Draw or photograph the signature: a signer can’t be saved without one.”; and if you close the popup with changes in it, it asks “Drop this signer?”. Then the “Seal”: eight styles drawn on their paper — “Official round”, “Ink stamp”, “Office stamp”, “Wax”, “Gold foil”, “Medal”, “Guilloche”, “Modern” — or “My seal” for your real seal’s image, with “Text around the seal”, “In the centre” and “Text under the seal”. Then “Numbering”, with a live example (“DQ-2026-0001”) and “How numbers count”: “One sequence for the academy (recommended)” (every certificate takes the next number, whatever the course: no number repeats or skips) or “A sequence per certificate, with its own prefix”, plus “Prefix” and “Number of digits”. Below, the “Verification page” and “The academy on paper”. Every change shows in a bar at the bottom of the page (“Not saved yet: signers”) with “Discard” and “Save”; “Save” asks for your password in the “Confirm it’s you” popup (not again for ten minutes), then “Signature and seal saved”.
On screenSignersThe academy on paperEdit identitySignature & sealPreviewWith sample namesWho signsDefaultAdd a signerNew signerName as printedRoleDrawPhotograph the paperSave signerSealMy sealText around the sealText under the sealNumberingOne sequence for the academy (recommended)A sequence per certificate, with its own prefixPrefixNumber of digitsVerification pageDiscardSaveConfirm it’s youSignature and seal savedHeads-upWhat’s issued stays as issued: changing the signer or the seal never changes a certificate already issued, only what goes out after. The bar reminds you: “The 19 certificates already issued stay as they were.”
- Step 5 of 6
“Noqta” in the editor
Ask in a sentence, or read her suggestions; everything is drawn on the sheet before you accept it.
- “Ask”“Make it more elegant”, “Add French”, “In green”, “Add a seal”.
- “Noqta suggests”From your certificate and its source: a better template, a seal, a bigger code, clearer text.
- “Reviewed by Noqta”Before it reaches the student: what’s missing, what may be cut.
TipSelect an element, then the Noqta button in its toolbar: she suggests for that element alone.
All the details
Open the “Noqta” panel. In “Ask”, write: “Make it more elegant, and add French”. The proposals are drawn on the sheet at once, with a bar below naming them, “Dismiss” (Esc) and “Accept all” (↵). Accepting is a single undo step. Below, “Noqta suggests”: each suggestion with its reason, “Show on the sheet” and “Apply”. Then “Reviewed by Noqta” (“Before it reaches the student”). The promise is written in the panel: Noqta never writes a number she hasn’t read (duration, mark, number of sessions) and never promises what isn’t in the course. The French column takes the Latin name the student confirmed; Noqta never invents one.
On screenNoqtaAskMake it more elegantAdd FrenchIn greenAdd a sealDismissAccept allNoqta suggestsShow on the sheetApplyReviewed by Noqta - Step 6 of 6
Preview, read “Before activating”, then approve
A preview with your real students, and a checklist before anything goes out.
- “Preview as:”“Students who can earn it” with their score, or “Sample names”.
- “Before activating”Fields, name, longest name, code, margins, contrast, signatures.
- VersionsEach approval is a new version; what was issued with earlier ones stays as it is.
TipPreview with the longest name and with a female student: if the sentence and the name hold for them, they hold for everyone.
All the details
At the top, “Preview as:”: choose from “Students who can earn it” (with their score) or “Sample names”, and the whole sheet changes: name, wording, mark. “Preview” shows it in full. Then the main button: “Activate the certificate” the first time (or “Activate and grant to 3” if some students already earn it), or “Approve the design” after changing an active certificate. It opens “Before activating”: every field has a source, the student’s name is there, the longest name fits, the code scans, everything is inside the margins, the contrast is enough, signatures are ready; with an average, the rank and the tier. Beside each note, “Show me” selects the element. Anything blocking reads “Something is blocking activation”. A new version is saved; what was issued before stays as it is. Then “Open the certificate page”.
On screenPreview as:Students who can earn itSample namesPreviewActivate the certificateApprove the designBefore activatingShow meSomething is blocking activationOpen the certificate pageHeads-upEditing the design touches nothing until you click “Approve the design”: until then the certificate page says “The design has changes that aren’t approved yet.”, and its “Design” tab can approve them too with “Approve the new design”.
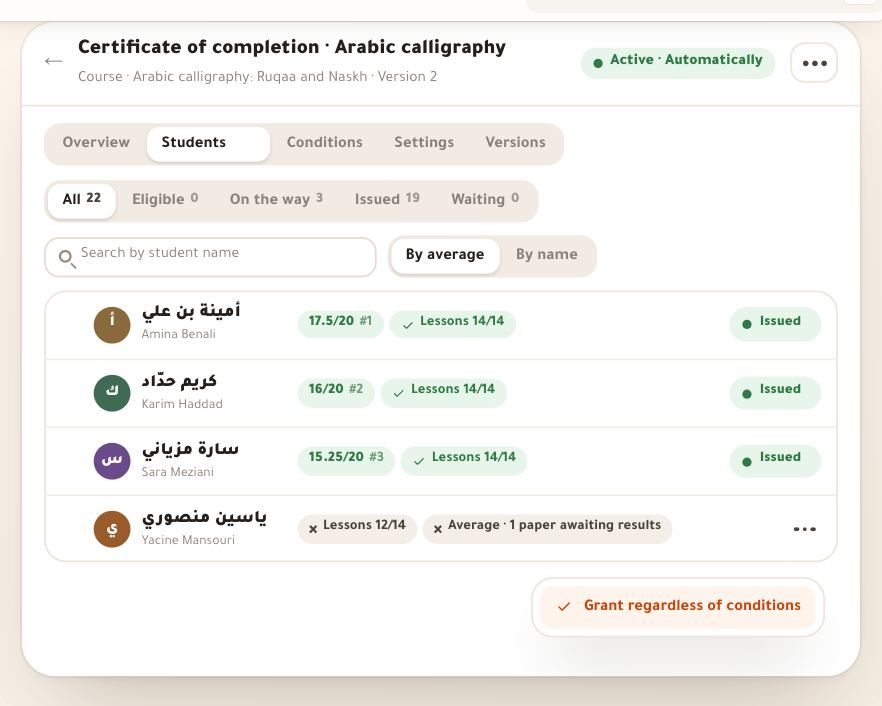
After approving the design
- Grant and follow upWho earns it, approvals, the register and verification: the lesson “Issuing and following up”.
- What the student seesThe goal in their course, name confirmation, the completion moment: the lesson “The certificate for students”.
- The conditionsAverage, tiers and rank: the lesson “When the certificate is granted”.
Questions
Can I upload a Canva design?
Not as a whole background image: the certificate is built from elements so fields fill in and print sharply. Take the closest template and change its colours and words, or ask Noqta.
How do I place my logo?
“Add” → “Your logo”: your academy’s logo, a letter or a crest, from its properties.
A long name spills off the line
Turn on “Fits the name” in the name’s properties, and try “Name test” on your real students.
A certificate in Arabic and French?
Yes: “Second language” from “Add”, or ask Noqta “Add French”. The second column takes the Latin name the student confirmed.
I edited the design after issuing: what happens to those?
Nothing: each certificate keeps its version. In the certificate page’s “Design” tab, under “Versions”, you can reissue older ones with the current version.
Do colours print as I see them?
The certificate goes out as a PDF at the sheet’s real size. Keep elements inside the “Print margins” so the printer doesn’t cut them.