
Proof sections: showing that your offer is real
Once visitors understand what they are buying, they ask: is this real? These sections answer with what can be checked: numbers the platform computes and you do not type, reviews your students wrote themselves, and work and clips that only appear with their makers’ consent. That is why you will find no “write a quote” field and no number to type. All of it works for every workspace. Our examples: Samir, a wedding photographer who teaches photography, Lamia, a fitness coach, and Yacine, a video editor.
- About 3 minutes per section
- 7 steps
Who can do it: Anyone allowed to edit showcases.
In 7 steps
- 1“Real numbers”: up to four facts, computed and rounded down by the platform, hidden below their floor.
- 2“The creator”: your face, name, role and background, in seven layouts including “Studio” and “Profile”; “Logos”: those you really worked with, in five.
- 3“Sourced reviews”: reviews your students wrote and screenshots with a source and consent, in six layouts.
- 4“Student work”: what your students made, with consent, in seven layouts including “Before/after”, “Viewer” and “Featured work”.
Show all
- 5“Video results”: short silent clips from students who agreed, in six layouts including “Stories”.
- 6“Moments”: photos from your path, each with a tag and one line, in six layouts including “Film strip”.
- 7“Certificate”: your course’s active certificate with its design and real conditions, in five layouts including “Your name”; hidden without an active certificate.
Before you start
- A showcase open in the editor. Add the section from “Add a section” and change its layout in the “Layout” tab.
- For the numbers: enrolled students, members or live sessions held above their floor (20, 15 and 3). Until then the section stays hidden.
- Your real photo, and photos or clips from students who agreed to publish (a parent’s consent for children).
- For verified reviews: students enrolled in your course.
- Step 1 of 7
“Real numbers”: numbers you do not type
You pick up to four facts; the platform computes and shows them. No number typed by hand.
- Where do the numbers come from?Students, members, lives, lessons, the year you joined… all computed from your account.
- When does it show?Once a real number passes its floor: 20 students, 15 members or 3 lives.
- How is it rounded?Always down: 1,240 students show as “+1,200”.
The 6 layouts
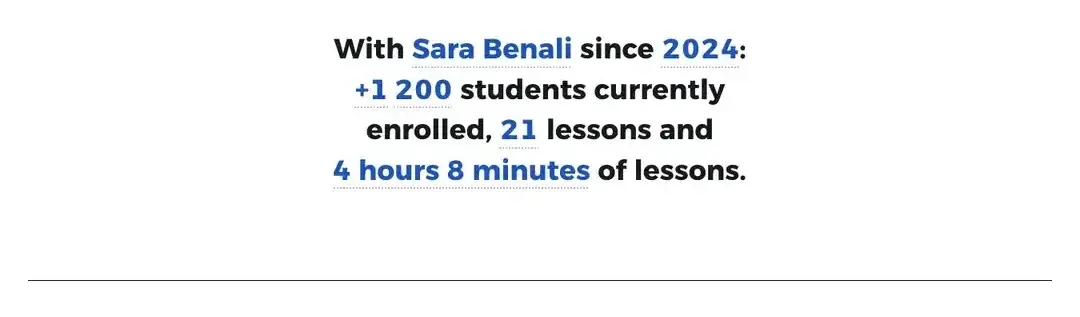
SentenceOne line, in your name. Tip“Year joined” comes from your start date on the platform, so you can say “since 2022” even before you have enough students. And in “Band”, three numbers look less balanced than two or four; the editor says so.
All the details
“Real numbers” accepts no typed number: under “Numbers shown” you pick up to four facts (no repeats), and the platform computes and shows them. The facts: “Students enrolled”, “Space members”, “Live sessions held”, “Posts this week”, then “Courses”, “Lessons”, “Lesson time”, “Free lessons”, “Chapters”, “Upcoming live sessions”, “Sessions”, “Book pages” and “Year joined”. Each social proof has a floor: 20 students, 15 members, 3 live sessions, and a value below it never shows. Rounding is always downward: 1,240 students show “+1,200”, 87 stays 87. If no social proof clears its floor, the whole section stays hidden. The six layouts: “Sentence”, one generated line with your name (“With Samir since 2019: …”); “Chips”, a row of small chips; “Band”, large numbers in a row under the “Heading”; “Bento”, a dark tile for the strongest number with the others beside it; “Monument”, the strongest number alone and very large, the rest as one quiet line below; “Cards”, each true number in its own card with an icon above it, the first one tinted in the page’s colour. The heading shows above “Band”, “Bento” and “Cards”, and screen readers read it in the others.
On screenReal numbersNumbers shownStudents enrolledSpace membersLive sessions heldYear joinedSentenceChipsBandBentoMonumentCardsHeadingHeads-upDo not write “I trained 500 students” in any text: the checker catches a number next to the word student or member. The section needs at least two numbers, one of them social proof: “Appears once a real number clears its floor, such as 20 students or 15 members.”.
- Step 2 of 7
“The creator” and “Logos”: who is behind the offer
Your face, name and words on the offer, your numbers from the platform; and the organisations you really worked with in “Logos”.
- What you writeYour display name, role line, a short bio and up to 4 checkable credentials.
- What comes on its ownYour student count and the year you started, when “Numbers” is on.
- The logosUp to 12, only for real collaborations. With no logo uploaded the section stays hidden.
The 7 layouts
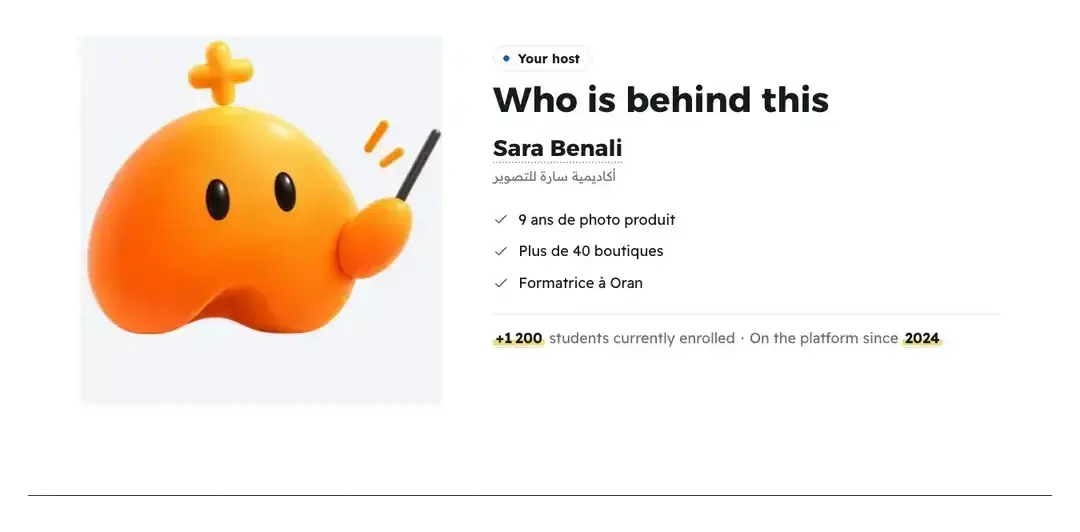
PortraitA large photo and your words. TipLamia, a fitness coach, puts what can be checked under “Experience and credentials”: “Gym coach since 2016”, “Coaching 15 members every week”. Superlatives (“the best”) do not belong there. In “Logos”, Yacine shows the channels whose videos he really edited; the editor reminds: “A row of logos convinces best from three upwards.”.
All the details
“The creator” puts a face on the offer: your name and photo come from your account or the workspace identity, your numbers from the platform, the words are yours. You write “Display name” (empty shows your account name; put a brand or pen name here), “Role line” (“Wedding photographer and trainer, Oran”), “About you” (who you are, what you teach and to whom; write the way you speak), up to 4 lines in “Experience and credentials” (“Video editor for YouTube channels”), then “Your photo” (without one, your initials show; a real photo builds more trust). The setting “Numbers” shows your students and the year you joined; turn it off for a section about you alone. On course pages the section’s “Heading” reads “Your teacher” by default, because a student asks who teaches them, not who sells: a heading the platform once wrote (“Who you'll learn with”) follows it by itself, and a heading you wrote stays as it is. The seven layouts:“Portrait”, a large photo with your words and numbers; “Letter”, a signed letter “A letter from …” in a reading column, the words first and the numbers after; “Ledger”, the photo beside a sheet with the rows “Name”, “Field”, “By the numbers” and “What you can check”; “Byline”, a short signature with a small round photo; “Studio”, with three “Your work” items, each a square image and a “Caption”; and “Board”, the photo with your credentials pinned as chips, the name and words on one tile, each figure on its own; and “Profile”, a profile page: a cover band (the first image of “Your work”, else the brand’s tint), your round face over its edge, then your name and role, up to three figures large in one row, your credentials as pills, then the bio and the Facebook link if it is in the site settings. “Photo shape” (“Theme frame”, “Arch”, “Circle”) for “Portrait”, “Studio” and “Ledger”. For organisations you really worked with or appeared at, there is “Logos”: it starts empty, and nothing shows until you upload a real logo. You add up to 12 under “The logos”: “The logo” (on a transparent background, PNG or SVG, so it stays clean on every colour), “Organisation name” (read by those who cannot see the image, and shown in “Cards”) and “What you did there” (“Training for the marketing team”). By default the logos take one calm ink: grey on light grounds, white on dark ones, so a row of brands reads quietly; the switch “Original logo colours” gives each one its own colours back. The five layouts: “Strip”, one calm row between two hairlines; “Marquee”, an endless band that stops under the pointer or focus and stands still when motion is off; “Grid”, a framed table with an equal cell per logo; “Cards”, each logo on a card with its name and what you did there; “With a line”, “The line” set large on a dark slab (“Training, workshops and content for teams…”), the logos under it. Two settings: “Logo size” (“Normal” or “Large”) in “Strip”, “Marquee” and “With a line”, and “Speed” (“Slow” or “Normal”) in “Marquee”.
On screenThe creatorYour teacherDisplay nameRole lineAbout youExperience and credentialsYour photoYour workNumbersPhoto shapePortraitLetterLedgerBylineStudioBoardProfileLogosThe logosThe logoOrganisation nameWhat you did thereOriginal logo coloursStripMarqueeGridCardsWith a lineThe lineLogo sizeSpeedHeads-upDo not type your student count or “accredited certificate” in the bio: numbers come from the platform and the checker flags the rest. “Studio” without three works warns you: “The “Studio” layout shows three of your works. Add them.”. No logo without a collaboration: “Show a logo only if you really worked with that organisation or appeared there. Without a real collaboration it is a false claim.”. With no logo uploaded: “Upload at least one logo to show this section.”.
- Step 3 of 7
“Sourced reviews”: what your students wrote themselves
Reviews your students wrote from their own accounts, and screenshots you upload with their source and the author’s consent. No quote typed by hand.
- Verified reviewsWritten by enrolled students after you ask. You can’t edit them, but you can reply.
- ScreenshotsUp to 12, each with its source and the author’s consent confirmed. Unconfirmed ones never show.
- The score out of 5A number and a short bar, for verified reviews only; the average shows from five ratings up.
The 6 layouts
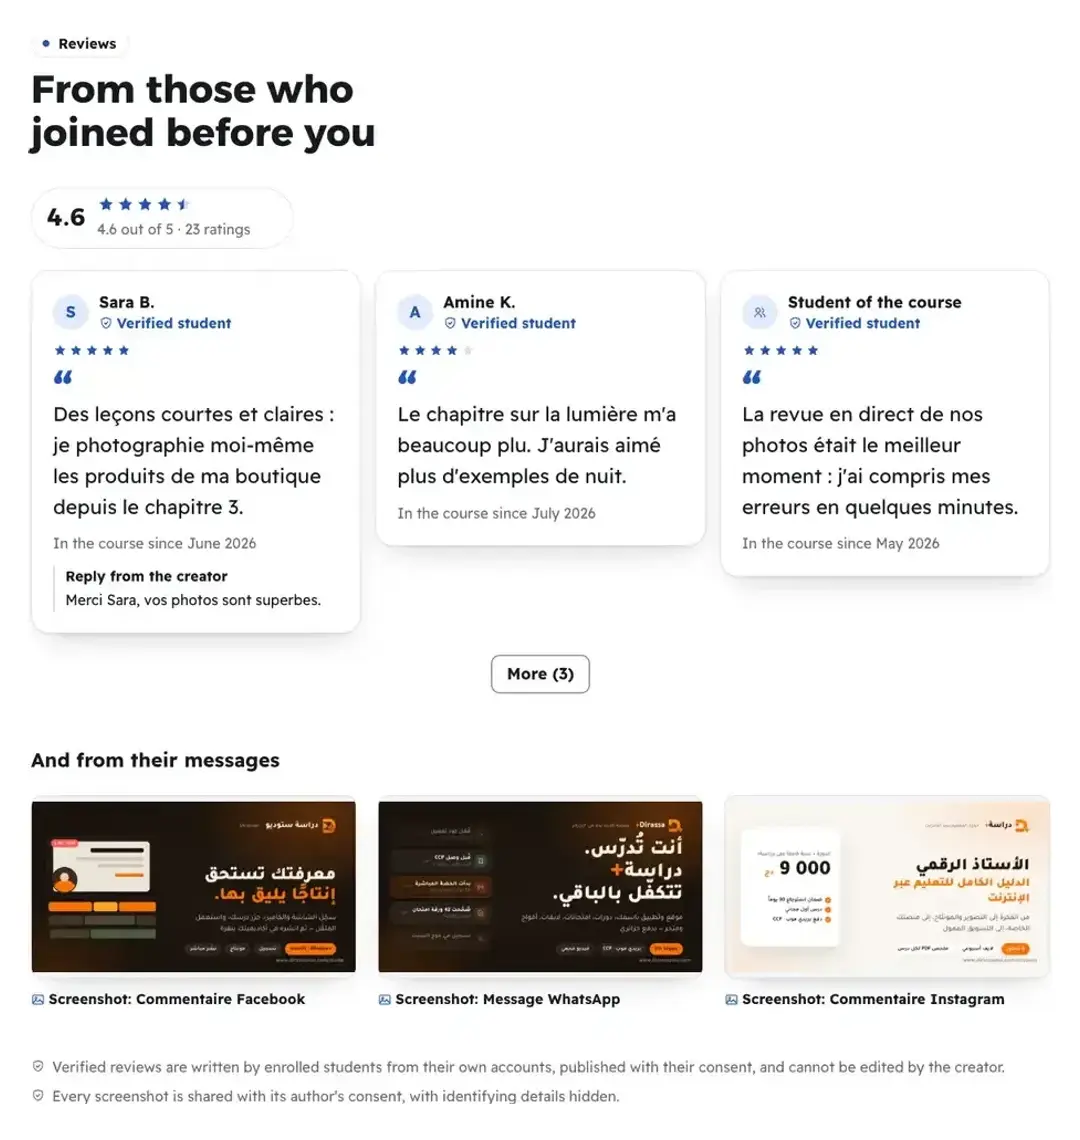
WallA grid of cards, then “More”. TipAsk for reviews from “Ask for reviews”: the request goes to every eligible student or a random sample, so you neither pick names nor choose reviews, and that is what makes them credible. Eligible, for example: a student in the course for 7 days and at 30% progress.
All the details
“Sourced reviews” accepts no typed quote, and has two sources. The first is verified reviews: your enrolled students write them from their own accounts when you ask under “Verified reviews” in the growth tools; they carry “Verified student” and “In the course since …”, you cannot change a word, but you add a “Reply from the creator”. The score belongs to them alone, as a number and a short bar, and the average “4.8 out of 5” comes from five ratings or more. The second is the “Review screenshots” (up to 12) that you upload: the “Screenshot”, the “Source” (“Facebook comment”, required, shown as “Screenshot: …”), the box “I have the author's consent and hid what identifies them” (an unticked screenshot never shows) and “Public post link (optional)”. No score, no claims. The six layouts: “Wall”, a grid of cards, 3 or 6 then “More”; “Spotlight”, one large review with two beside it and the rest under “More”; “Chat”, the reviews as messages in a phone frame titled “Student reviews”, never a fake WhatsApp; “River”, every review in one paragraph where the voices alternate, each signed inline; “Screens”, a rail of screenshots; and “Score”, the average large with its bar and the five bars (the count per level, from “5 out of 5” to “1 out of 5”) on a tinted board, beside the verified reviews on wide screens and above them on phones; until there is an average, only the reviews show. Two settings: “Number shown” (“3 reviews” or “6 reviews”) and “Sources” (“Verified and screenshots”, “Verified only”, “Screenshots only”).
On screenSourced reviewsVerified reviewsVerified studentReview screenshotsScreenshotSourceI have the author's consent and hid what identifies themPublic post link (optional)WallSpotlightChatRiverScreensScoreNumber shownSourcesVerified and screenshotsVerified onlyScreenshots onlyAsk for reviewsHeads-upThe section stays hidden until the first review is published or a screenshot is ready: “No screenshot ready: add one with its source and confirm consent.”. A screenshot without a source or without the box ticked never shows. And check that the link field accepts a full https link.
- Step 4 of 7
“Student work”: what they really made
What your students really made, as a photo or a before/after pair; no work shows without its maker’s consent.
- What you uploadUp to 12 works, each with a photo, a first name and a caption.
- ConsentA work without its maker’s (or guardian’s) confirmed consent never shows. Children: no faces.
- Before and afterAdd a “before” photo and the work becomes a pair visitors compare with a finger.
The 7 layouts
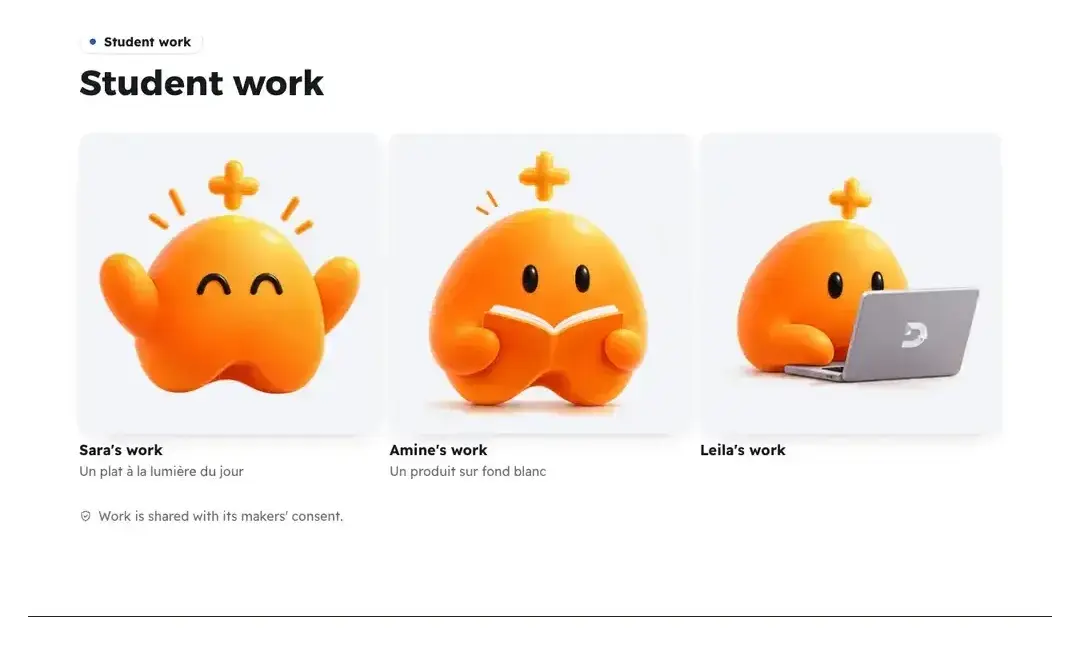
GridSquare photos that enlarge on tap. TipYacine, the editor, adds for each student a “before” (the raw footage) and an “after” (the edit) in “Before/after”, and visitors feel the difference with a finger. The section can appear twice: one “Gallery” and one “Viewer”.
All the details
“Student work” shows what your students made: photos, edits, designs, cakes, calligraphy. You add up to 12 “Works”: “The work (or “after”)”, “Before” (optional) which makes it a pair to compare, “First name”, “Caption”, and the box “I have the maker's (or a parent's) consent”: an unticked work never shows. For children: no faces, first name only, with a parent’s consent. The seven layouts: “Grid”, square images a tap enlarges; “Before/after”, a slider the visitor drags between “before” and “after” (up to 6 pairs, at least one “before”); “Gallery”, the first work large with the others around it, anything beyond five counted on a “+ number” tile; “Filmstrip”, sliding sideways; “Pinboard”, prints pinned with tape at a slight tilt; “Viewer”, a window showing one work large with thumbnails below that switch it with a tap; and “Featured work”, one work hung large like a gallery’s centrepiece with its wall label beside it: its number (“01 / 03”), the student’s first name when names are shown, the caption and a “Next work” button; under it, a strip of the other works as thumbnails switches it with a tap, with no script at all; with a single work there is no strip and no button. Settings: “Show first names” and “Image shape” (“Square” or “Portrait”) for all but “Gallery” and “Viewer”.
On screenStudent workWorksThe work (or “after”)“Before” (optional)First nameCaptionI have the maker's (or a parent's) consentGridBefore/afterGalleryFilmstripPinboardViewerFeatured workNext workShow first namesImage shapeHeads-up“Before/after” with no “before” at all: “No before/after pair yet: add a “before” image to one work.”. And an unticked work is flagged: “A work stays hidden until you confirm consent.”.
- Step 5 of 7
“Video results”: silent clips of what they made
Short silent clips of what your students achieved; each plays when the visitor reaches it.
- The clipVertical and silent, up to 30 seconds, or a GIF. Up to 12 clips.
- ConsentNo clip shows until you confirm its maker agreed to publishing.
- Under each clipThe first name and what they made, in one line.
The 6 layouts
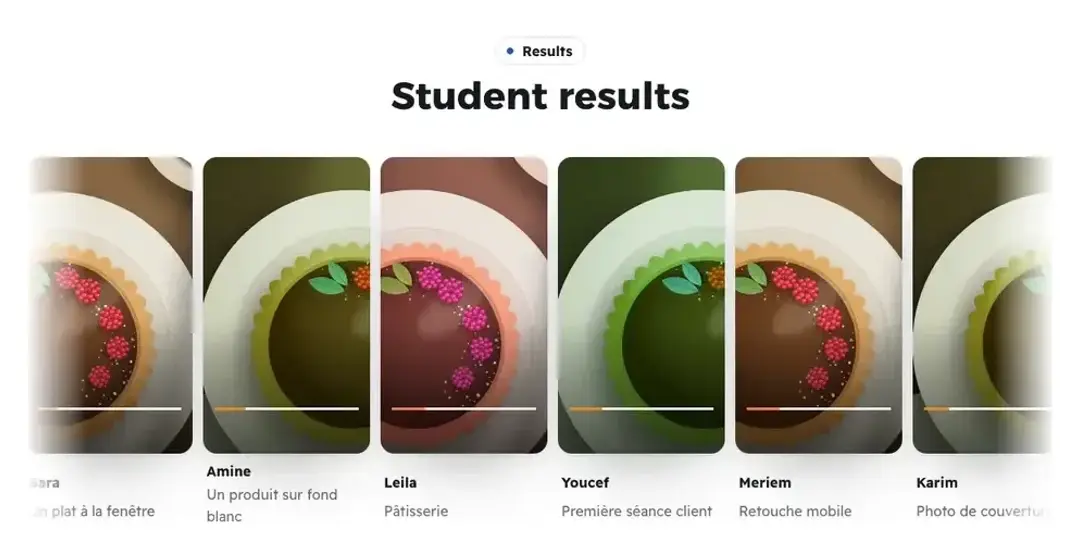
MarqueeAn endless moving strip. TipAsk your students for a 15-second clip of what they made: Lamia takes from a client a clip of the exercise she nailed, and writes “What they made” in one line. From four clips up, “Marquee” looks best.
All the details
“Video results” shows short silent clips of what your students made; each one plays only when the visitor reaches it. You add up to 12 “Clips”: “The clip” (vertical, silent, up to 30 seconds, or a GIF), “First name”, “What they made”, and the box “The student agreed to publish”: without it the clip does not show. The six layouts: “Marquee”, an endless strip that stops while the visitor hovers or focuses on it; “Rail”, a row the visitor swipes; “Grid”; “Spotlight”, one large clip with up to four beside it; “Phones”, up to three clips in phones, the middle one raised; and “Stories”, the clips as round story bubbles in a row, each clip’s picture in a ring with the first name under it, above one large player on a dark slab that takes the clip’s colours; a tap on a bubble switches the large clip, and small bars above it show where you are, with no script at all. Two settings: “Speed” (“Slow” or “Normal”) in “Marquee”, and “Captions”.
On screenVideo resultsClipsThe clipFirst nameWhat they madeThe student agreed to publishMarqueeRailGridSpotlightPhonesStoriesSpeedCaptionsHeads-upBefore you publish, open every clip and check the consent box is on: “Some clips stay hidden until you confirm their students agreed to publish.”. The section needs at least one confirmed clip.
- Step 6 of 7
“Moments”: photos from your path
Real photos from your path, a talk, a workshop or field work, showing where your experience comes from.
- What you uploadUp to 8 moments, each with your own photo and a title.
- WhenThe year of the moment, for “Timeline” and “Film strip”.
- When does it show?Once one moment is complete: a photo and a title.
The 6 layouts
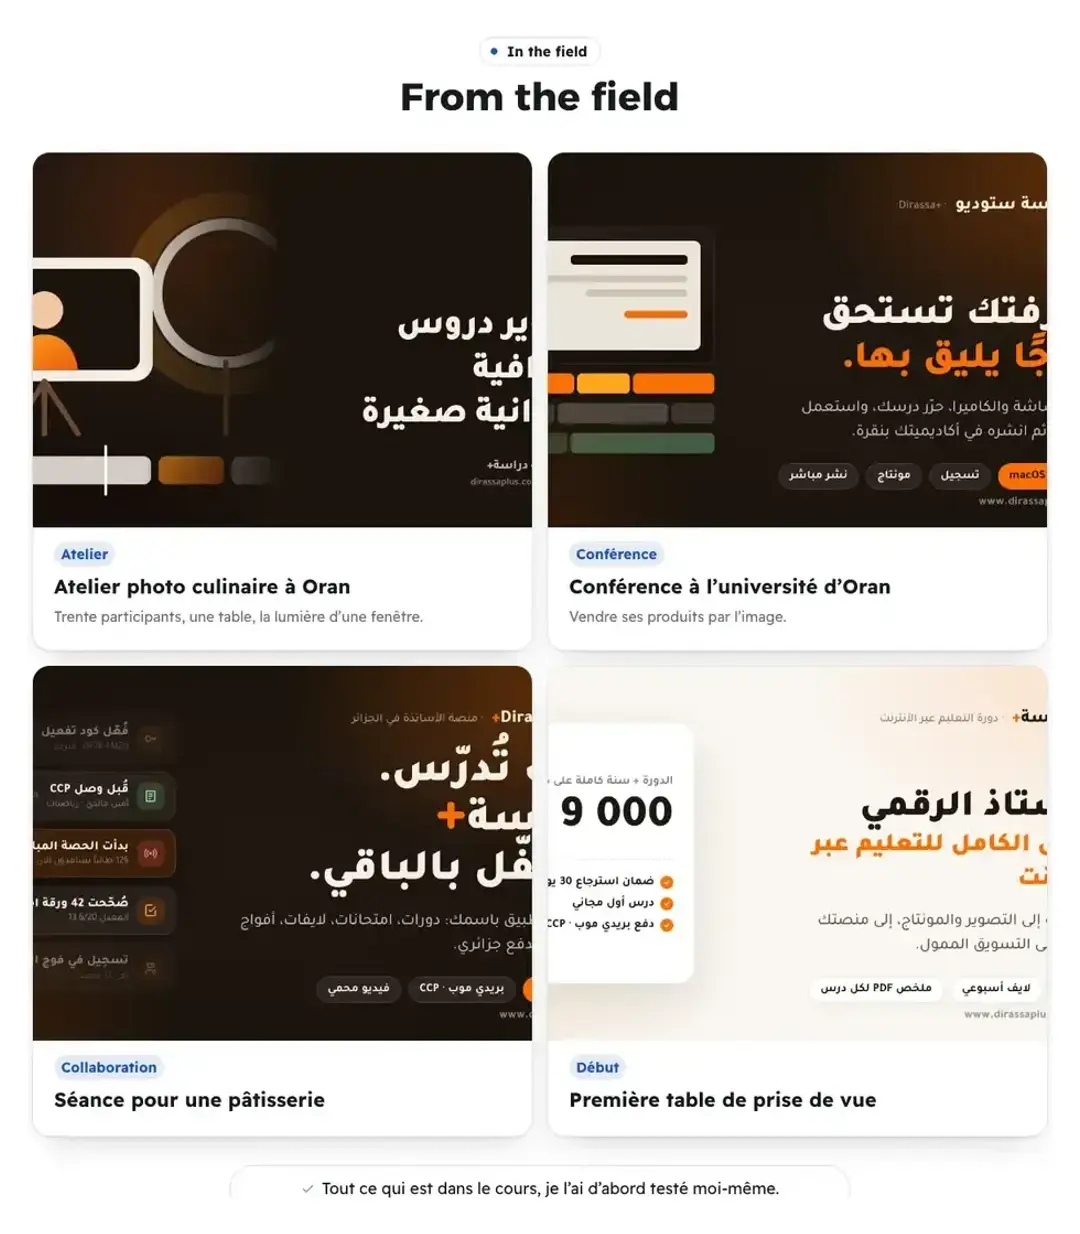
CardsA card per moment. TipSamir chooses “Timeline”: “2018” his first wedding, “2021” a workshop at the art school, “2024” his first class of students. Real photos with an honest description.
All the details
“Moments” shows where your experience comes from: a talk, a meeting, a workshop, a shoot. You add up to 8 “Moments”, each with “Photo” (yours, never stock), “Tag” (“University talk”), “Title” (required), “One line” and “When” for “Timeline” and “Film strip”; at the bottom an optional “Closing line”. The six layouts: “Cards”, one card per moment; “Rail”, a sideways row; “Mosaic”, the first photo large and the rest as tiles; “Timeline”, dated stops using the “When” field (“2021”); “Polaroids”, tilted prints with tape that straighten on touch; and “Film strip”, the moments as 3:2 frames on a dark film strip with quiet sprocket holes, each frame captioned underneath with its number, tag and year (the “When” field), then its title and line; the strip runs to the page edge, scrolls sideways and stops on each frame.
On screenMomentsPhotoTagTitleOne lineWhenClosing lineCardsRailMosaicTimelinePolaroidsFilm stripHeads-upA moment without a photo or a title does not show, and the section needs at least one complete moment: “Add at least one photo with its title to show this section.”.
- Step 7 of 7
“Certificate”: your real certificate, with its conditions as you set them
Visitors see their name on your real certificate before they buy. It shows when the course has an active certificate.
- When does it show?When you activate a certificate for the course or track in “Certificates”. Until then it stays hidden.
- What you writeThe heading and intro only. The certificate itself comes from your design.
- What is computedThe condition sentence, from your conditions: “After completing the 24 lessons and passing the exam”.
The 5 layouts
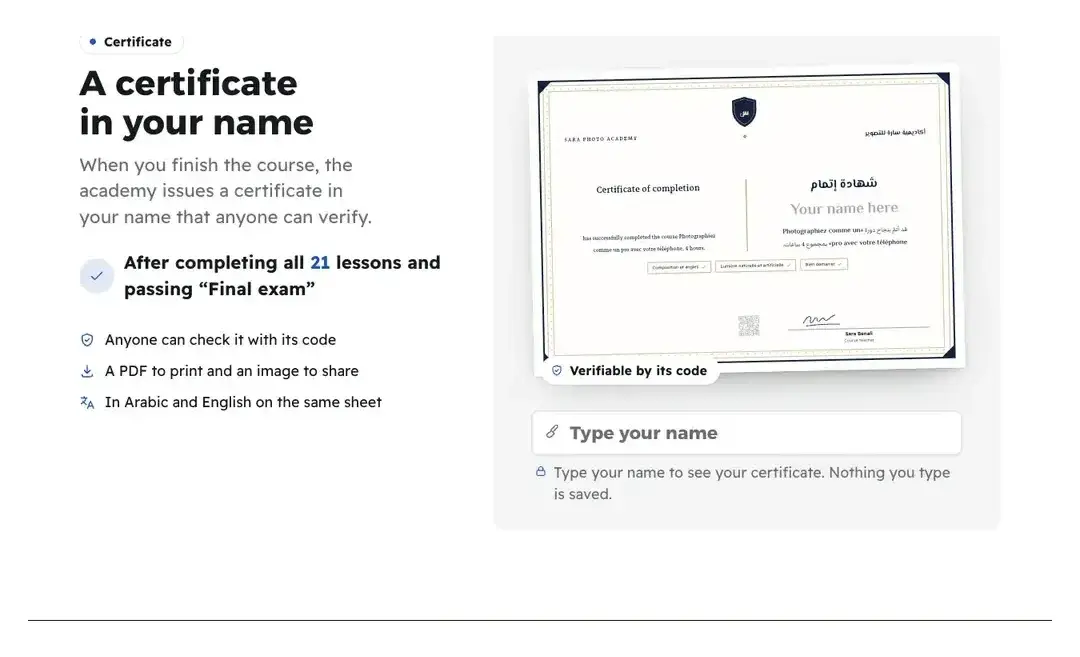
Your nameThey type their name and see it on it. Nothing is kept. TipSamir puts “Your name” near the price: visitors type their name and see the “Wedding photography” certificate in their name before paying, and the sentence under it says exactly what it takes to earn it.
All the details
“Certificate” shows the real certificate active for the page’s course (or for the track a bundle sells), in its own design. It shows only when the course has an active certificate in “Certificates”; before that it waits for its data and says: “This section shows only when this course has an active certificate. Turn one on in “Certificates” and it shows with its design and conditions.” with “Open “Certificates””. It can be added to six kinds of showcase: “One course”, “Course bundle at one price”, “Choose your course”, “Mixed bundle”, “One live session” and “Live series”. You write only the “Heading” and the “Intro”: the certificate, the numbers and the names come from “Certificates”, and the condition sentence is written from the certificate’s real conditions, such as “After completing all 24 lessons and passing the final exam”. The five layouts: “Your name”, visitors type their name into “Your name as it will appear on the certificate” and watch it appear on the real certificate, with “Type your name to see your certificate. Nothing you type is saved.” under the box (nothing is sent or kept), and beside it the conditions and up to three true points such as “Anyone can check it with its code” and “A PDF to print and an image to share”; “Fan”, a track’s course certificates spread behind its own; on a single course’s page its certificate shows alone on a stack of paper, and “Ready to publish?” suggests “Pick another layout”; “On the desk”, the certificate printed and lying on a desk; “Strip”, a compact band beside the offer: the certificate as a thumbnail, its name and “verifiable by its code”; and “Before/after”, “Your way there” step by step, from “You join the course” through each condition (lessons, the exam with its pass mark, attendance…), then “At the end” the certificate with “A certificate in your name”. Settings: “Name box position” (“Under the certificate” or “Above the certificate”) and “Points under the conditions” in “Your name”, “Panel colour” (“Soft” or “Dark”) and “Certificate slightly tilted”. With an active certificate, Noqta suggests this section in “Design my page”: “The course has an active certificate: visitors see their name on it before buying.”
On screenCertificateThis section shows only when this course has an active certificate. Turn one on in “Certificates” and it shows with its design and conditions.Open “Certificates”Your nameFanOn the deskStripBefore/afterYour name as it will appear on the certificateType your name to see your certificate. Nothing you type is saved.Anyone can check it with its codeVerifiable by its codeYour way thereAt the endA certificate in your namePick another layoutName box positionPoints under the conditionsPanel colourCertificate slightly tiltedHeads-upThe word “certificate” is allowed in the page’s text only when the course has an active certificate. “Accredited”, “official certificate” and “diploma” are always refused by the checker: the certificate comes from your academy, not a state diploma.
After the proof sections
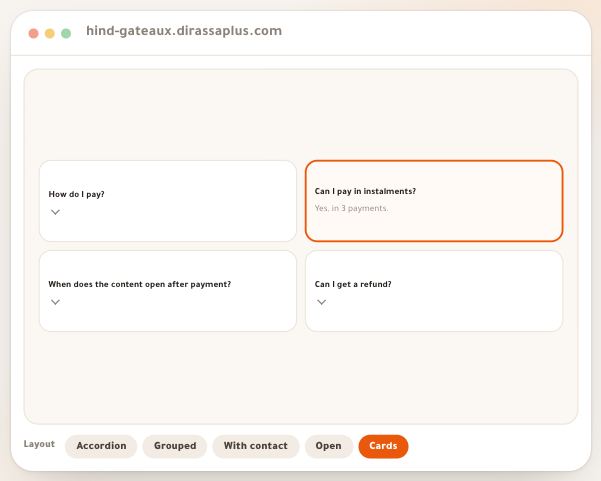
- Answer the doubts“Questions”, “Guarantee” and “Pay and start” carry on what proof began.
- Place the priceOne price section carries the page’s button, then “Final word”.
- Ask for reviewsFrom the growth tools, verified reviews start reaching your page.
- Check on a phoneWork and clips are read on phones first, so check the long layouts.
Questions
Can I type my student count myself?
No, and the checker catches it. “Real numbers” and “The creator” show the numbers the platform computes, with floors (20 students, 15 members, 3 live sessions) and downward rounding.
Why does “Real numbers” not appear?
Because no social proof has cleared its floor yet, or only one number is left. The section appears by itself once the numbers pass their floors.
Can I write a student’s review myself?
No. Verified reviews are written by students from their own accounts and cannot be edited. To show more, upload a real screenshot of a message or comment, with its source and its author’s consent.
Why are my students not sending reviews?
The request only goes to eligible students (for example in the course for 7 days and at 30%), and once every 90 days per student. Only reviews from students who were sent the request and wrote one appear.
Do I need the student’s consent to publish their work?
Yes, and it is a technical condition: a work, clip or screenshot without the consent box ticked does not show. For children: a parent’s consent, no faces, first name only.
How many clips in “Video results”?
Up to 12, one vertical silent clip of up to 30 seconds per student. From four clips up, “Marquee” looks best.
Can I put “Student work” twice?
Yes, “Student work” and “Real numbers” up to twice per page; the other proof sections once.
Can I show a famous brand’s logo I never worked with?
No. “Logos” is only for organisations you really worked with or appeared at; without a real collaboration it is a false claim. And the section does not show until you upload a logo yourself.