
Edit your lesson in Dirassa Studio’s editor
The recording stops and the editor opens. Here you cut what you don’t want, speed up a software install that drags, zoom in on the button you are explaining, remove pauses, filler words and sentences you said twice, put your words on the video, clear the room’s echo from your voice, then export a file ready for your lesson. All on your computer, and nearly all of it without coins.
- About 10 minutes for a 20-minute lesson
- 6 steps
Who can do it: Requires Dirassa Studio on your computer and a recording made in “Studio” mode. Cloud transcription and “Find repeated takes” need a connection and a computer linked to your school; everything else works offline.
In 6 steps
- 1Cut, split and change speed from the bar under the preview: “Toggle Split”, “Mark a range” and the speed badge on each clip.
- 2Add “Zoom” segments from your clicks or by hand, automatic (following the cursor) or manual.
- 3In “Audio” → “Clean up”: “Analyse the recording”, pick how tight and what goes without asking, then “Make a clean cut”.
- 4In “Captions”, pick the model and language, then “Generate the captions”; fix the text from the “Captions” button at the top.
Before you start
- A recording made in “Studio” mode: the editor opens by itself when you stop, or later from Dirassa Studio’s “Media library”.
- Disk space if you want the models locally: from 466 MB to about 2.4 GB for captions, 229 MB for Studio Voice, downloaded once.
- Headphones: clean-up and Studio Voice are judged by ear before by the numbers.
- A connection and a computer linked to your school, only for cloud transcription and “Find repeated takes”.
- Step 1 of 6
Cut, split and change speed
Under the preview is the toolbar. “Toggle Split” (key S) turns the pointer into scissors: click the clip where you want to split it, then select the extra part and press Delete. For an exact span: “Mark a range” (key I for the start, then O for the end) shows its length with “Cut the marked range” (Shift+Delete), which cuts it and closes the gap, or “Clear the mark”. Drag a clip’s edge to trim its start or end. Each clip carries its speed badge (“1x”): press it and pick 0.25x, 0.5x, 1.5x, 2x, 4x or 8x, or “Custom” between 0.1 and 20; the new length shows next to it. “Undo” (⌘Z) and “Redo” follow you through every step.
On screenToggle SplitMark a rangeCut the marked rangeClear the markCustomMuteKeep the pitchMatch the speedUndoRedoTipSpeed shortens a wait without removing it: a software install that drags, exporting a large image, a slow drawing on the whiteboard, at 4x or 8x.
Heads-upWhen you change the speed, the clip’s sound is muted by default (the “Mute” option). If you are talking in it, choose “Keep the pitch”, or “Match the speed” to speed the sound up with the picture.
- Step 2 of 6
Zoom in on what you explain
On the “Zoom” track at the bottom of the timeline, if it is empty and your cursor was recorded, a “Click to generate zoom segments” button builds zooms from your clicks during the recording. Or click the track where you want one: a one-second segment is added, drag to lengthen it. Each segment shows its amount (“2.0x”) and its kind: “Automatic zoom” or “Manual zoom”. Click a segment and the side panel opens “Zoom Amount”, from 1x to 4.5x, and “Zoom Mode”: “Auto” follows the moving cursor, “Manual” lets you place the spot on a frame of the video. Drag its edges to change its length.
On screenZoomClick to generate zoom segmentsAutomatic zoomManual zoomZoom AmountZoom ModeAutoManualDelete the zoom segmentSelect all zoom segmentsTipFor a lesson on an app full of buttons (photo editor, spreadsheet, video editor), 1.5x to 2x is usually enough: the student can read the button and still see where it sits.
Heads-up“Auto” needs the cursor to have been recorded. To remove a segment, right-click it and choose “Delete the zoom segment”, or select it and press Delete.
- Step 3 of 6
Clean up pauses, fillers and retakes
Open the “Audio” tab in the side panel, then the “Clean up” card (“What this recording would lose, and what it would keep.”). Press “Analyse the recording”; two questions follow: “How tight?” (Gentle, Balanced, Tight, Everything) and “And what may it do without asking?”: “Silence only” (the starting choice: “Anything that removes words you said is shown to you first.”), “What it is sure of”, which also removes what you marked while recording and what you corrected out loud, or “Decide for me”. A report with numbers appears (“23 unnecessary pauses”, “9 filler words”, “3 need your review”) and the “Estimated clean length”. “Make a clean cut” cuts in one pass; “Review each one” shows every proposal with its reason and time, so you choose “Keep” or “Remove”, then “Apply N chosen”. And “Find repeated takes” reads what you said to find sentences you repeated and starts you abandoned.
On screenAudioClean upAnalyse the recordingHow tight?And what may it do without asking?Silence onlyWhat it is sure ofDecide for meEstimated clean lengthMake a clean cutReview each oneFind repeated takesCut silenceTipFiller words and retakes are read from the text of what you said: generate captions first (next step), then analyse. Under “Clean up”, the “Cut silence” card lets you set “Shortest gap” and “Breathing room” by hand.
Heads-up“Decide for me” removes everything it finds and then shows you what it did: “A sentence cut in error is found by your students, not by you.” Listen before exporting; “Undo” brings a cut back. “Find repeated takes” costs 1 coin per ten minutes of recording at most, charged at what the reading actually cost, and needs a connection.
- Step 4 of 6
Captions: your words on the video
In the “Captions” tab, pick the “Model”: “Cloud transcription” (“No download — the highest accuracy”), which needs a linked computer and draws on your Studio plan’s media hours, not coins; or a local model, “One time download to your system. All captions are stored locally.”: “Balanced” (about 640 MB), “High Accuracy” (about 2.4 GB), “Small” (466 MB), “Medium” (1.5 GB). The “Recommended” badge follows the lesson’s language: on “Balanced” for a European language, on “Cloud transcription” or “Medium” for a lesson in Arabic, when “Balanced” and “High Accuracy” read “European languages only”. Then the “Language”: “Auto Detect” or the lesson’s language (Arabic, French, English… more than twenty). Press “Generate the captions”. Set the font, colours and “Active Word Highlight”, and turn on “Export with Subtitles” to burn them into the video. The “Captions” button at the top opens the whole text: fix a word, delete words to cut that moment from the video, or download an SRT or VTT file.
On screenCaptionsModelCloud transcriptionBalancedHigh AccuracySmallMediumRecommendedEuropean languages onlyLanguageAuto DetectGenerate the captionsGenerate them againActive Word HighlightExport with SubtitlesTipNames, places and terms from your subject (Lightroom, your clients’ names, maths symbols): add them once in Settings → “Transcription” → “Remembered terms”: “These hints are applied when you generate captions in the editor.”
Heads-up“Balanced” and “High Accuracy” only know European languages, and are not available on Intel Macs. Picked for a lesson in Arabic, they show: “This model only knows European languages, so it can't caption Arabic. Choose «Medium» instead.” With “Auto Detect” on an Arabic interface, the lesson is treated as Arabic.
- Step 5 of 6
Studio Voice: clean sound without an expensive mic
In the “Audio” tab, the “Studio Voice” card separates your speech from the room with a neural network, then treats the echo, the level and the sibilance from what it measured in your recording, “All on this device — no audio leaves it.” Turn on the switch, press “Download the model (229 MB)” once for all your lessons, then “Render”; you hear the untouched microphone until it finishes. “What we found” compares before and after: “Room noise”, “Speech over noise”, “Loudness”, “Reverb”, “Mains hum”; hold “Hold to hear the original” to compare by ear. Then “Strength” (Light, Natural, Strong), “Room under the voice” (None, Faint, Natural) and “Where”: “Whole lesson” or “Marked parts” only.
On screenStudio VoiceDownload the model (229 MB)RenderWhat we foundRoom noiseReverbHold to hear the originalStrengthRoom under the voiceWhereWhole lessonMarked partsLower the screen's sound under your voiceTip“Strong” for a tiled hall or a laptop mic, “Light” for a quiet room and a good microphone. If you recorded system audio, turn on “Lower the screen's sound under your voice”: the video you show gets quieter while you talk and comes back when you stop.
Heads-upStudio Voice is free and works offline, but it needs a microphone track: otherwise you see “This recording has no microphone track.” And export renders the voice first if you haven’t (“Mastering the voice”).
- Step 6 of 6
Export the video
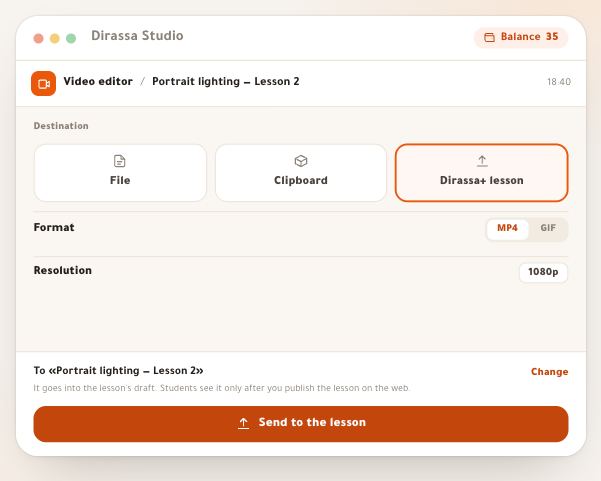
Press “Export” at the top of the editor. “Destination” has two choices: “File” saves the video on your computer, “Clipboard” copies it to paste straight away. Then the “Format” (MP4 or GIF), the “Resolution” (720p, 1080p or 4K), the “Frame Rate” (15, 30 or 60), the “Quality” from “Potato” to “Maximum” between “Smaller file” and “Larger file”, and “Optimize the file size” (“Re-encodes in software for a much smaller file — slower.”). Press “Export to File” and choose where to save: “Saving to a file”, then “Export complete”. For a lesson with an on-screen demonstration, choose MP4 and 1080p.
On screenExportDestinationFileClipboardFormatResolutionFrame RateQualityOptimize the file sizeExport to FileExport completeBack to editorTipThe starting values are MP4, 720p, 30 frames and “Maximum”, and they are kept for your next export. For a long lesson watched on phones, “Optimize the file size” makes the file much smaller at the cost of a longer export.
Heads-up“Destination” no longer offers a share link: the video comes out as a file, which you then put in your lesson on Dirassa Plus as the lesson on publishing from Dirassa Studio explains.
After exporting
- Put it in a lessonFrom the exported file to a lesson in your course on Dirassa Plus.
- Generate its questionsQuestions anchored to the seconds of your explanation.
- Finish the lessonText, files and a quiz around the video, in the lesson editor.
- Record the next oneWith the same settings, and its script in “Lesson scripts”.
Questions
What costs coins in the editor?
Only “Find repeated takes”: 1 coin per ten minutes of recording at most, charged at what the reading actually cost. Cuts, speed, zoom, clean-up, Studio Voice and local captions run on your computer for free, and cloud transcription draws on your Studio plan’s media hours, not on coins.
Are captions local or in the cloud?
Both, your choice in “Model”. Local models download once, work offline and stay on your computer. “Cloud transcription” needs no download, gives the highest accuracy and needs a computer linked to your school.
My lesson is in Arabic or darija — which model?
“Cloud transcription”, or “Small” or “Medium” with “Arabic” in “Language”. “Balanced” and “High Accuracy” are “European languages only”, and the “Recommended” badge moves off them when the lesson is in Arabic. There is no option for darija on its own, so read the text through and fix it from the “Captions” button.
Will clean-up remove words without telling me?
Not with the starting choice, “Silence only”: anything that removes words is shown to you first in “Review each one”. “What it is sure of” also removes what you marked yourself, and “Decide for me” removes everything it finds, then shows you what it did.
I cut too much — how do I get it back?
“Undo” (⌘Z) in the toolbar reverses the last cut, “Redo” applies it again. What you remove from the timeline never touches the original recording on your computer.
Can I export the captions file on its own?
Yes, from the “Captions” button at the top of the editor: the SRT and VTT buttons download the file, to add to the video wherever you like.
Where is the share link?
It is no longer offered: “Destination” has “File” and “Clipboard”. Students watch the lesson in your course on Dirassa Plus, so export a file, then publish it in the lesson.
Does Studio Voice change my original recording?
No. It treats a copy of the microphone, used for playback and export; the original stays: hold “Hold to hear the original” to compare, or turn the switch off.