All parts
School website
The Designer: your school's website, its pages and identity, its campaigns and blog, and its domain.
- The Designer at a glanceThe “Designer” is where your academy’s site is made: its pages, its identity (colours, fonts, shapes), its menu and footer, the campaigns that sell, and its blog. Everything you change stays a draft visitors don’t see until you publish — and the home tells you how many changes wait, how the site did this week and what it’s missing.7 steps · 6 minutes
- Pages and the editorEvery page of your site — home, courses, “About”, “Contact” — lives in the Designer’s “Pages”, laid out as visitors meet it: what’s in the menu, what’s outside it, and the designs that apply to every course or product. From there you open the editor: the page’s sections on one side, the page in the middle, the chosen section’s properties on the other.7 steps · 8 minutes
- Designer campaignsA Designer campaign is a landing page in your site’s identity that sells a single offer: a course, an early-bird launch, a book paid on delivery, or a free live that grows your audience. It starts from one question — what is it for? — then a template that lays out the whole path (the page, the order, the thank-you…), tied to an offer that carries the price and payment methods.5 steps · 6 minutes
- The blogA post that answers a question your students type into Google can bring you students every month. The Designer’s blog writes it with you: Noqta turns one of your lessons into a draft, or you write it with your lesson blocks, adding your course card or a free file in exchange for a phone number. Once published, you see for each post who read to the end, who clicked the course, and who bought.5 steps · 7 minutes
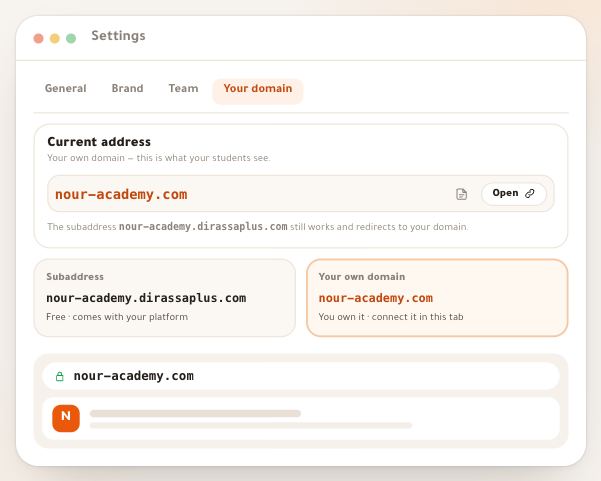
- Your own domainYour platform works from day one on a free subaddress, such as nour-academy.dirassaplus.com. If you own a domain, such as nour-academy.com, connect it and it becomes the address your students see. Every step of the Your domain tab is explained here: what to type, the records to add at your registrar, and the checks until it works.4 steps · 10 minutes, then the DNS wait